
Hello WHBS readers! I'm Erin from Lansdowne Life, where I blog about my creative DIY projects and adventures in home decorating. Things like painting, sewing, landscaping, and all sorts of other thrifty handmade goodness. Stop by and see me sometime!
I have a three-year-old daughter, and she loves doing crafty projects. Sunprints (or cyanotypes) are a great activity for children: no mess, quick results, and a dose of sciencey magic!
I love projects that are simple enough for kids to do, but have sophisticated frame-worthy results. This is one of those projects! Are you ready? Let's put some of that summer sun to work!

What you need:
- Sunprint light sensitive paper
- Flat objects with interesting shapes
- Two cookie sheets or trays
- Water
- Sunlight!
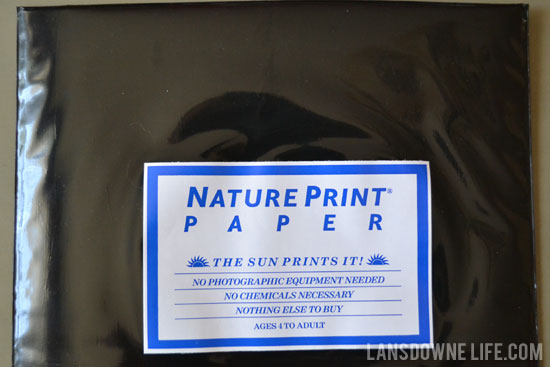
I bought my sunprint paper at a local art supply store (20 - 11"x17" sheets for $14), but it's also available online in various sizes. It might seem pricey, but I cut my sheets in half to 8.5"x11", so really I paid something like 35 cents a sheet.

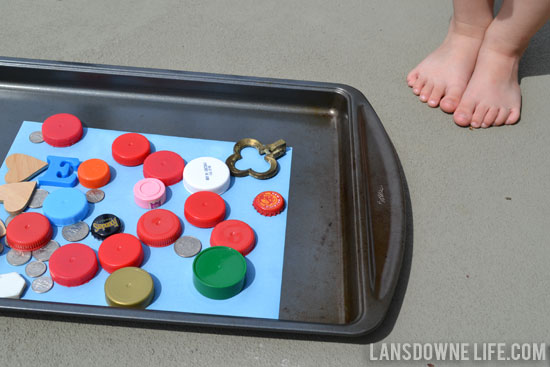
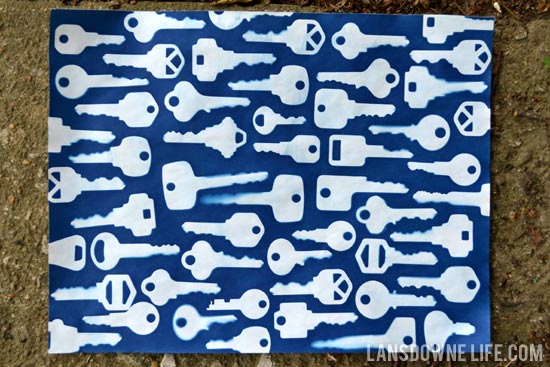
First, collect up interesting flat objects from around the house. Coins, keys, bottle caps, buttons, letter magnets, toys -- anything is fair game! Be creative, but don't choose anything too tall that would cast a shadow across the print. You can certainly do the traditional nature-based botanical prints with leaves or flowers too.
Put the sunprint paper blue side up on a cookie sheet. Then arrange the objects on the paper. The paper is very sensitive to light, so make sure to do this step inside and out of direct sunlight.
Now comes the fun part! Carefully transport the cookie sheet outside and place in direct midday sunlight. I left mine in the sun for two minutes, but follow the instructions on your package of paper. Don't overexpose the print; make sure you take it inside after the recommended time. Be careful, though. A metal cookie sheet might get hot even after just a couple of minutes in the sun.
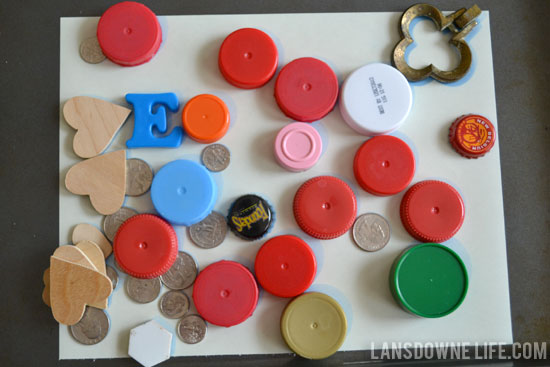
In the sun, the paper will fade from bright blue to nearly white.
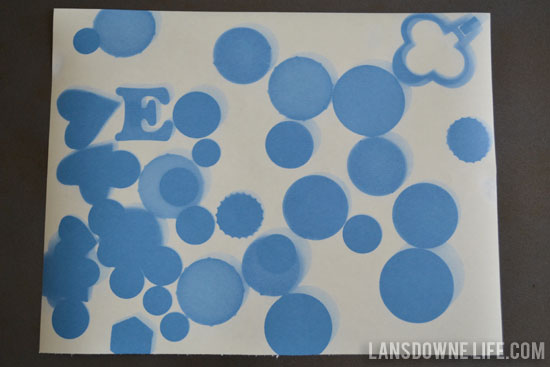
But everything that was protected underneath the objects will still be blue.
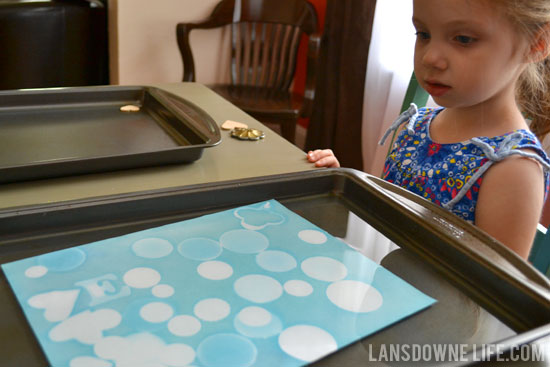
And now the magic begins! Fill a second cookie sheet with water and submerge the print to develop it. Watch as the white turns blue and the blue turns white! I left mine in the water for one minute, but again, follow the instructions on your package of sunprint paper.
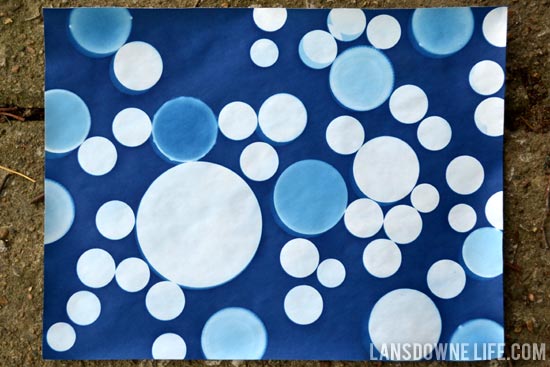
The print will continue to darken as it dries, ending up a vivid cobalt blue.

The truly opaque objects leave a bright white shadow, while the more translucent plastic lids and such produce a cloudy lighter blue. Experiment! Try layering things and see what kind of effects you can create.
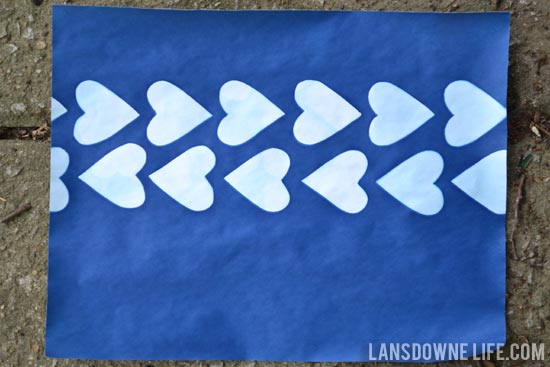
But the kids shouldn't be the only ones to get in on the fun. After my daughter was done, I made a few prints myself.
Thanks for having me today, Ann Marie!
Has your jaw dropped, too? WOW! How awesome is this project?! I love how the artwork looks so crisp and polished because of the technique, but that her daughter was right along side her creating! Beautiful, hip, and meaningful. So in love with this project!
Thank you, Erin!! You rock my socks off!!! 😉
Jodi
I love it! I have been meaning to try this with my kid(s) for years after using it during a summer camp long ago. Thanks for the reminder and I love the key print!
Megan
Very, Very cool! I need that paper. What fun!