
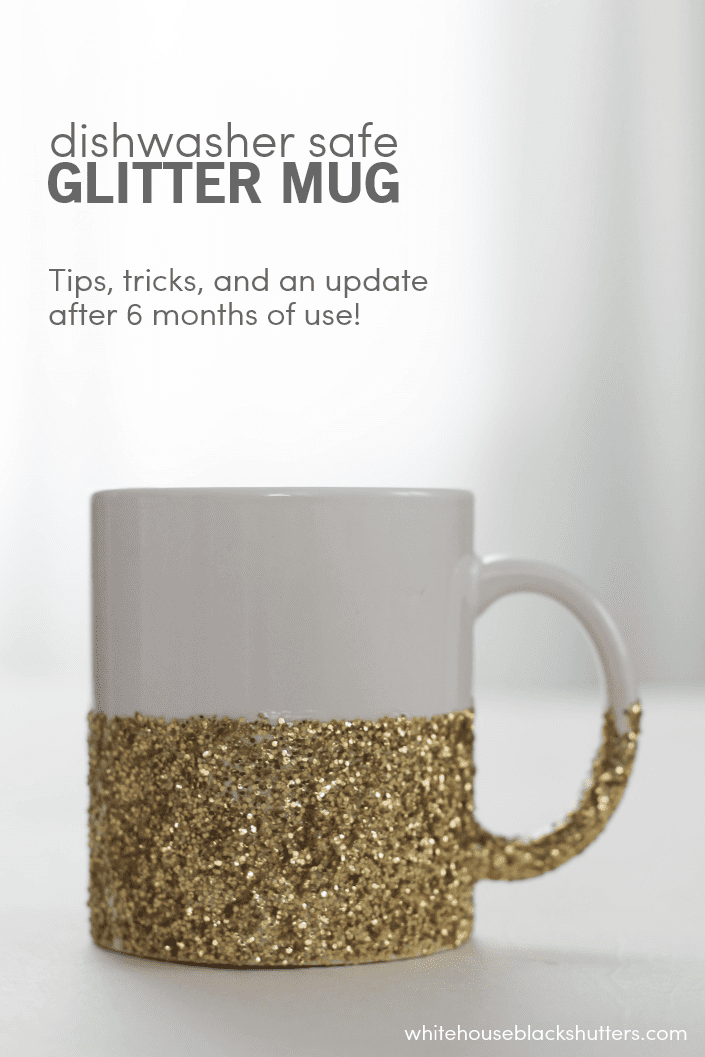
Three years ago, I made a dishwasher safe glitter mug and posted the tutorial. You guys must have thought it was cool or something because it then went crazy on Pinterest and Instagram. I've had a few people asking for a glitter mug update so here is the update I wrote after 6 months of use. 3 years later, it still looks great and everything I said here applies.

Still looks awesome, right?!
I've forgotten how many times it has been through the dishwasher but I am guessing we use it at least 2-3 times a week. It was made 6 months ago 3 years ago and I'm guessing it has been washed in the dishwasher 50-70 times, oh I lost count how many times. After having the cup that long, I have some tips I want you to read before you make your own.
Read this tutorial for how to make it, and make sure to follow the tips below.
1.) Use GLOSS not MATTE finish
I have two cups: one I did the wrong way (on the left) and one I did the right way (on the right).
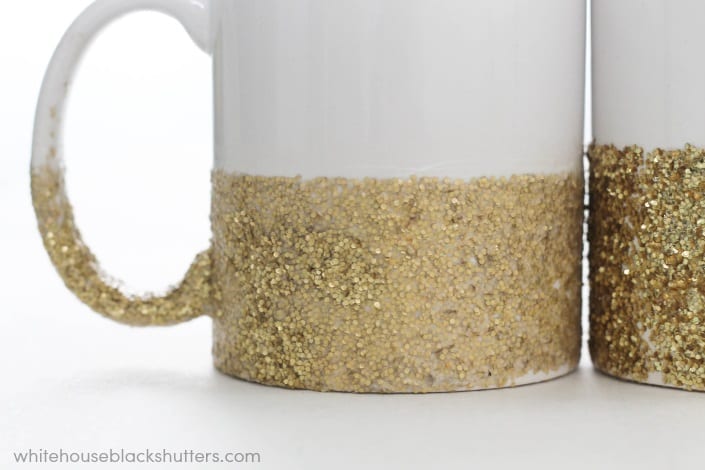
I used the matte finish on the left and the GLOSS finish on the right. See the difference? The gloss makes it looks like your cup was dipped in glitter. The matte held up well too, but it looks like there is a layer of wet glue on top. Use the gloss NOT the matte.
2.) Leave enough time between coats
According to the instructions, wait about a day in between coats. You might do it differently with okay results, but I know that waiting worked so I don't recommend doing it sooner.
3.) Let your cup dry/cure for the full 28 days
I cannot stress this enough. Make sure you wait or else your glitter might not stick! This recommend is right on the bottle so I wouldn't mess with it. 🙂
4.) Use the formula recommended!
In my tutorial, I use Martha Stewart Decoupage in Gloss. You can find it in Michael's stores. I have not tried other formulas or Mod Podge and do not know if they are truly dishwasher safe. You can try it out! But do so at your own risk. 🙂 If you can't find the product and aren't washing them, they will probably look fine.
Since I wrote the original post Mod Podge HAS come out with a dishwasher safe formula (at Michael's as well), but I have not tried it just yet. Did they make it because this cup is so awesome? Maybe not but I'd like to think that, haha! 😉
Update: I still haven't tried it, but some readers have told me it works great! I guess both are made by Plaid Crafts so who knows, might even be just the same product in a different bottle.
5.) This isn't fool proof.
One of the photos on Instagram that I was tagged in (of many, many pictures) did not work. It stuck and all, she said she followed the instructions to the T, but her cup looked like a mix of the gloss and matte cups above. I feel awful! But I didn't make the formula and don't know if there was something off with her bottle.
Hundreds (if not thousands) have tried this and I've only heard once of a problem. I wish I could guarantee it will work, but I can't do just that.
If you have a problem, look for a number on the back of the bottle and let them know!
Here is the tutorial to make your own dishwasher safe glitter dipped mug.
Let me know if you make one! Either tag me on Instagram (I'm @whbsblog), use the hashtag #glittermug, , message me on facebook, or email me amheasley @ gmail . com. 🙂
If you'd like to see MY glitter mug in action, use the hashtag #glittermugchronicles.
UPDATE (Nov '16)
Our mug is still in use and looks great. Although I will say, I barely use it because my kids love to! 🙂
So many of you have followed this tutorial and glittered mugs are now a thing. How crazy is that?!?!?! When I made this tutorial, it was the FIRST one on the internet for making glitter mugs. Thanks for making, pinning, and sharing glitter mugs with your friends. 🙂


Dominique Cuccia
How do you apply with out the brush strokes showing up?
Ann Marie Heasley
As it dried, they were not visible
Brandy
Thanks! I actually got the modge podge dishwasher safe formula, not sure what finish it is. Guess we will see!
Ann Marie Heasley
I looked it up, their formula is gloss! So it should be good. Please keep me posted on how it turns out!!
Brandy Heatherly
It looks really nice! The modge podge formula ended up looking very similar to your gloss finish. Thanks again for the tutorial!
Ann Marie Heasley
Thank you for letting me know! You’re welcome, I’m glad it worked out well.
Brandy
I'm confused about the matte vs gloss finish. Is there a different technique when it comes to applying the mod podge? Or is it a spray? I'm currently on day two of sealing my first glitter layer, and it definitely has the matte finish. What do you do?
Ann Marie Heasley
There isn't a different technique, the decoupage comes in different finishes, you can tell what kind you have on the bottle you have. The gloss finish works well with the glitter and it looks shiny. The matte works well if you were working with wood, paper, and it is a more dull finish.
Kim
Is this microwaveabe?!?
Ann Marie Heasley
It is not, due to the metal glitter.
Leah
Is the sealant itself safe for the microwave? Has anyone tried it? I've been really into alcohol inks lately and am using the dishwasher safe mod podge to seal it. Seems the product would say if it were microwave safe, but then again, maybe its expensive to do like getting a product cleared by the FDA for food safety. From what I've read, It's very likely safe to reach the top of a cup and be just fine, but the cost is high and most art supplies do not go through that process. Mistie, I would try laying down a thicker coat of the podge so there's more glue for the glitter to grab on to. And, definitely wait the full 28 days before coming in contact with water. That part is crucial for the cure to complete.
Ann Marie Heasley
I really can't say. If you try it, please let us know! The only mugs I have made have metal glitter and we do not own a microwave.
I have not tried using the product to the top of the mug and do not recommend it since the sealant is not food safe. Do so at your own risk. I do not want to be sued or something if someone gets sick. 🙂
Lau
Hi, do you know now if alcohol ink + sealant is microwave safe ? I cant find the answer 🙁
Ann Marie Heasley
I apologize, I haven't used alcohol ink and cannot give advice. I do not believe the waterproof decoupage I used on this project is microwave safe. Best of luck!
Dedee
Do you suppose you can use the mug and hand wash it, while waiting the 28 days?
Ann Marie Heasley
I did hand wash it very carefully, not sure how long after the last coat, but I would try to wait as long as possible! Humidity and air temperature can sometimes affect things, I don't want your mug to get ruined. Hope that helps!
Mistie
I'm in the process of trying these right now. I'm allowing a day in between coats of mod podge, but it seems like there are still clumps of glitter coming off. Hoping I'll figure it out because they are gorgeous. Thanks for the tutorial!
Hibryd
"Since I wrote the original post Mod Podge HAS come out with a dishwasher safe formula (at Michael’s as well), but I have not tried it just yet and therefore can’t recommend it."
Mod Podge and Martha Stewart paints are made by the same company. The "dishwasher-safe" stuff could very well be the exact same formula in different bottles.
Ann Marie Heasley
I will update the post, thank you! I didn't know that when I wrote this. I haven't tried it since then but other readers have and say it works.
Rochelle
Stay away from the Regular (non-dishwasher-safe) Mod Podge. If it gets wet, the surface is ruined, and it also sticks to paper.
Bailee
These look great and I'm excited to try this at home. I was wondering, do you apply the decoupage to the glitter only or do you coat the entire mug to have an even surface?
Thanks!
Katy
I'm working on a few mugs and even a couple ball jars... Question: did you put more than one layer of glitter on your mugs? A few of mine have some bald spots and I want to add a light second layer to cover all the blemishes. Just wondered what you thought. Thanks for the update! 🙂
Ann Marie Heasley
I did not do two layers of glitter so I'm not 100% sure how it will turn out, but if I were you I would do the second coat with glitter, then two more coats to seal it. Make sure it is totally dry when you add this coat, and the next or it could come off and be gloppy. Otherwise, I might just do a couple dabs of the decoupage and sprinkle glitter onto just those blank spots.
Hope that helps, and fingers crossed that it turns out awesome! 🙂
Irene
I'm in NZ and really want to try this! Looks stunning! Is this the glue? http://www.fishpond.co.nz/Arts_Crafts/Plaid-Martha-Stewart-Decoupage-Formula-470ml-Gloss-Finish/0028995332777 Thanks xx
Ann Marie Heasley
yes, that is it! 🙂
(apologies for the delay in my response, the holiday season was pretty busy around here!)
Melissa
I would like to make these as Christmas gifts also - if I tell my friends not to use them in the dishwasher for 28 days - is that okay - but they could still hand wash after getting them??
Thank you for your awesome tutorial!!
Melissa
Nicole
Okay so I want to make these for Christmas gifts & birthdays but I don't have 28 days, could i bake it to seal it faster?!