
I’ve got spring fever! And cowbell won’t cure it…

But maybe my herb garden will!
One of my plans for the spring is to plant a large garden but since our Chicago winters last up until March or April, I haven’t started yet. All of our recent rain and GORGEOUS weather has melted most of the snow remains, but I can’t wait to get my hands in some dirt! I decided to start my herb garden seedlings in the window.
Since our windowsill is narrow, I took the glass containers from the arrangements in this post since I knew they would fit. Although they’re clear, I thought seeing the dirt would work since our kitchen has the dark accents and it would give the containers an earthy feel. The pots would look great in white or in your kitchen’s accent color!
I’ve been wanting to use chalkboard paint for a while and was excited to get started!

I taped off a section on the containers where I wanted the labels to be. I didn’t measure, since I really don’t want them all to be the exact size, just similar.

Flip them around if you get nervous about how they look from the front, I promise you’ll feel much better!

Phew! They look like rectangles and not blobs!
I used the brush-on paint since I have other projects in mind that will require brushing on, but Rustoleum also sells the chalkboard paint in a cheaper, spray paint version. I’d say for this project it’d be easier to use the spray paint, one coat and your done, while I needed two, but either way it wasn’t that hard (just required me to be a bit more patient).
Added the labels with chalk and practiced my cursive writing. I had a bit of bleeding, but I like the roughness of it so I left it. Scraping the excess off with a razor or your fingernail would take only a few seconds.

I put down a paper bag for easy clean-up, got out my seeds, and got planting.

Make sure that you read the labels of the seeds before filling and planting. I did them one by one since some seeds need a ¼” cover, while some only need to be “barely” covered.


Compare the pots as you go, so that they’re filled with a similar amount and don’t look weird.

Clean up is a snap if you put down the paper bag. Pick it up carefully and throw it into the recycling!
Since I know how we are around here (and since I love ziploc baggies), I put each seed packet into a bag, labeled it with a date, and put all of the tiny bags into a larger one.

Water and take pictures while you’re waiting for your seeds to sprout!

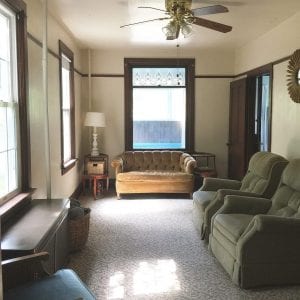
Like my newly painted trim? It looks soooo much better (to see the old, go back to this post about the containers).
More herb garden!
(insert Will Ferrell/cowbell sound effect here)


Cost: $7!
Containers were free (leftover from my wedding, $1 each if you buy them), dirt was free, maybe $1 worth of chalkboard paint ($12 to buy it), chalk was free, and the seeds were about $6 but I have TONS!


Kansas Amy
What a great idea! I wish I had the perfect window for an herb garden like you do. I did not know you could use the chalkboard paint on glass, I learn something every day! Thank you for sharing!
Heather @ McKinney Living
This MIGHT be my favorite idea ever! I plan on stealing it immediately! 🙂
AM from White House, Black Shutters
Thanks everyone, I'm so glad you all liked the project! Let me know if you do it and I'll link up! -Ann Marie
Kaysi
What a great idea!
Bonnie @ House of Grace
wow, you got a lot of comments!!! I love the banner especially lily!
Bonnie @ House of Grace
WOW!!!! Great job Ann Marie!!!! This is probably one of my favorites posts that you did so far. Keep up the great work.Bonnie
Mandi
Those are really cute, girlfriend! I love me some chalkboard labels.