

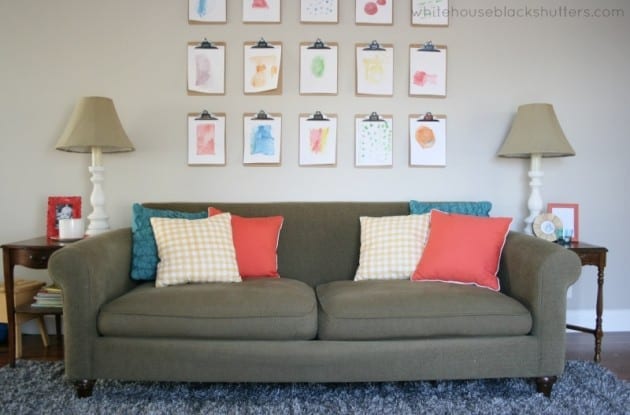
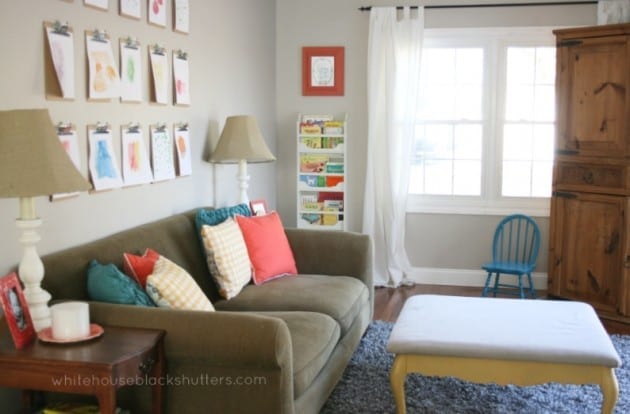
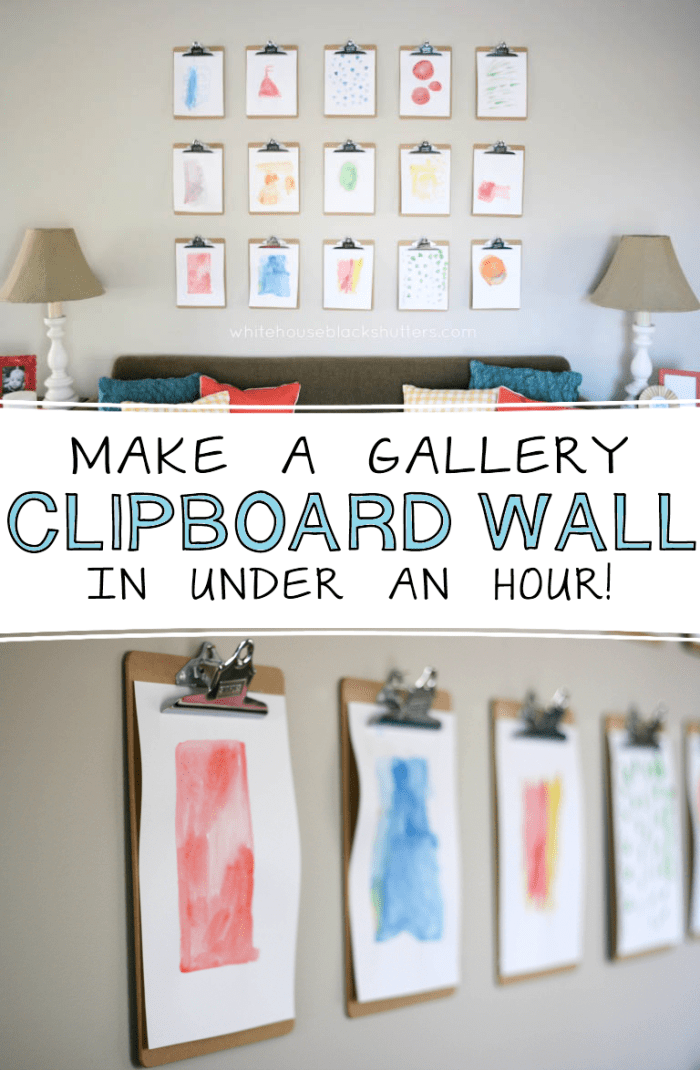
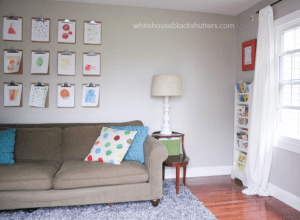
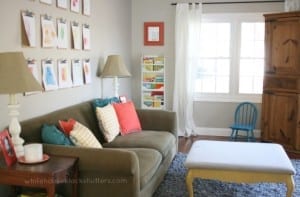
Recently I added some fun colors to our family room, and replaced the map over the couch with a gallery of clipboards. When I say this project couldn't be simpler, I mean it. The toughest part was the planning and pre-measuring. Or maybe it was making a trip to the office supply store around dinner time with three kids? Yeah, that was probably the toughest part. 🙂
First you need some clipboards. I didn't want anything plastic, colorful, or with a weird rectangle-y wire clip, see below:
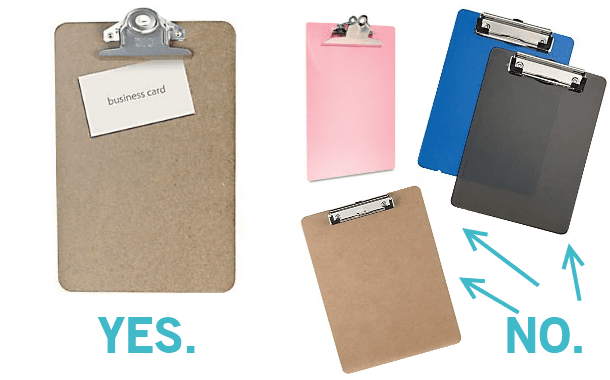
You can find a three pack of clipboards at Staples for $4.99 or so, or single clipboards for under $2 .
I like hanging things in odd numbers, so I went with a three by five wall with 15 clipboards. Odd, odd, odd: perfect! and for around $25, that's much much cheaper than finding 15 big picture frames.
Now to hang them, but how? I have plenty of tutorials pinned on the easiest way to hang stuff, but since I had 15 to hang, I didn't want to make more work for myself. I laid the boards out to see how close or far I should space them out and measured.
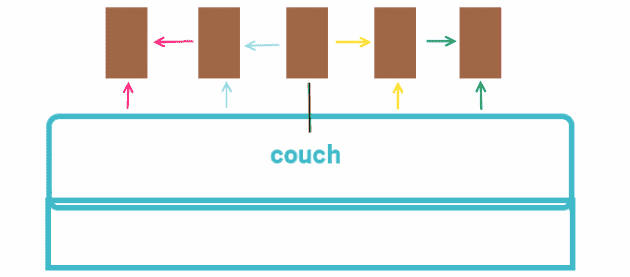
I set the clipboards 0n the top of the couch up there and leaned them against the wall, placing two on the outer edges, centering one in the middle, and centering two in between those. Measure and see how much space is between each one and get it all even. That's the biggest you can go in between boards horizontally.
I didn't want them directly behind our heads when sitting on the couch, so I measured six inches above the couch and it worked perfectly. I laid three clipboards onto the floor, spaced them out, and measured to see how close I would want them and what would fit on the wall.
I liked the look of the clipboards 6 inches up from the couch, and 4 inches apart (up and to the sides) the best.
So how do you hang them? Have your nails ready, a hammer, a tape measure, and take it a clipboard at a time. I made some doodles to help!
First, find the center of the couch, measure up six inches, hold the clipboard in place, use a nail to indent where the nail will go. Hammer in the nail and hang the clipboard.
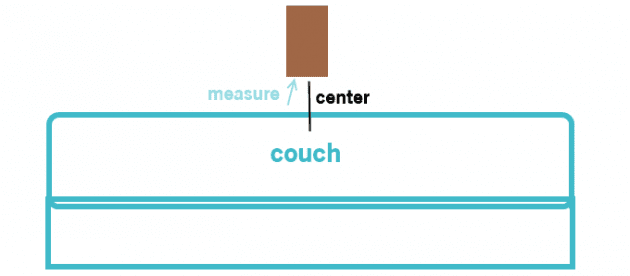
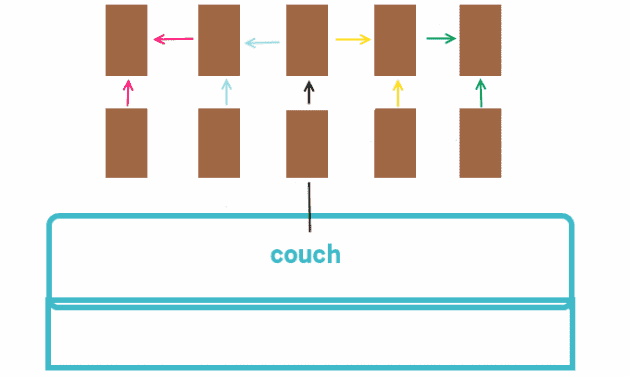
Measure 4 inches to the right of the board, 6 inches up from the couch (inching the boards up to align them), indent with your nail, hammer, and hang. Repeat for the clipboard next to it. Now go back to the center board and repeat for the left two boards. Any boards look weird? Measure to double check and fix if needed.
Now go to the next row of boards. Measure up, mark, nail, and hang. Measure over and up, mark, nail, and hang. Stand back to check, move onto the next row.
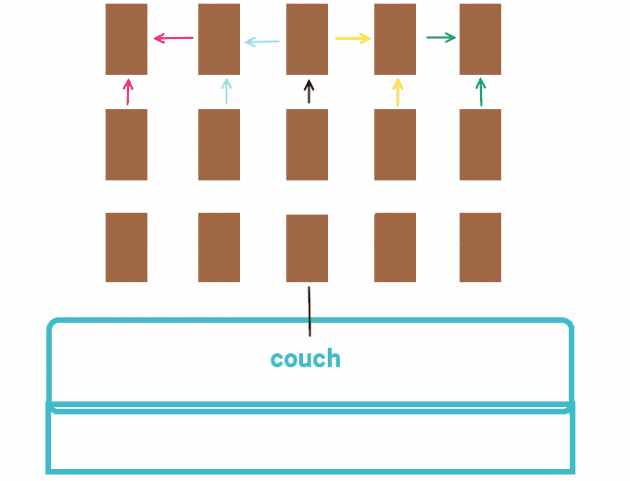
You're almost done! Do the last row repeating the process above. Stand back and if your couch doesn't look centered, scoot it over until it does. 😉
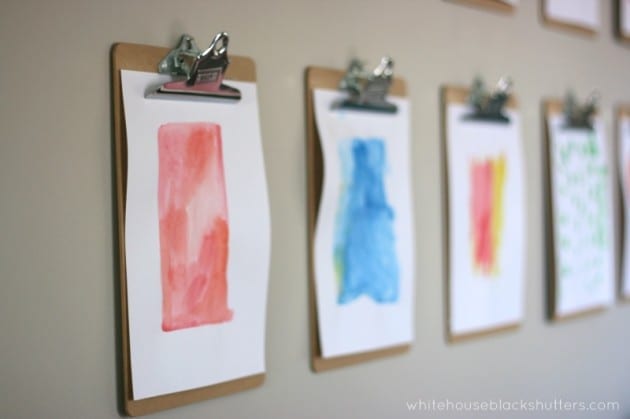
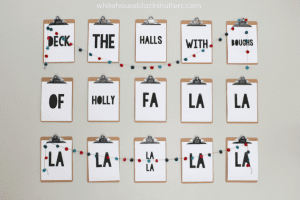
Now all you need to do is fill them! I put my kids to work painting watercolors and gave them prompts like "oooh, try a blue one!" "how about green dots?", but ultimately let them do their thing, and uhh, edited which ones I hung. 😉 You can also hang family photos or collages, stock black and white photos, prints, messages, or seasonal prints. The kids even had the idea to hang balloons from the clips for a birthday party!
The whole project took under an hour to finish with kids around (and asking for potty breaks). You can customize the wall any way you'd like, and it'd take a lot quicker if you were hanging less!
So, what do you think?
Do you love the industrial yet vintage-school look of the clipboards? Cause I'm smitten. 🙂

amy
I love this! I'm working on hanging chore chart/routine clipboards in the kitchen to try and "assist" my disorganized family in keeping our house in order. I know I'm probably delusional that it will work. But it makes my OCD feel better. THIS is even better. simple. artistic. organized...ooh so many things that make me smile. 🙂
Margaret
Hi Ann Marie, I just wanted to let you know that I like your blog and many of yours ideas but this one is one of my favorites. I loved it so much that I decided to feature it in one of my posts. To see it simply follow this link: http://www.miniowls.com/1/post/2015/07/creative-ways-to-display-childrens-art.html
Ann Marie Heasley
What a great collection, Margaret! Thanks for sharing it with me and for including our clipboard wall.
Nathalie
What a great idea. My kids are too old now, but I could hang some photos and change them ! Thank you. I will do it in my bedroom
Nicole H
Thank you, I really love this idea! I always have kids' artwork all around the house, but this is a much more organized way to display it. And instead of having them peel the paint off my walls with tape, the kids could easily clip their creations onto a board themselves! Thanks for the great idea! 🙂 I think I'll start with a 3x3 square.
Ann Marie Heasley
I'm happy you enjoyed it, Nicole! Send me a picture if you make one, I'd love to see it. 🙂
Jessie Rae
This is a-freaking-mazing! I'm doing this this week. You are a genius!!! And I wish you'd come decorate my house for me;)
Sam M. | Atkinson Drive
Cute idea! I'd love for you to join the Pinworthy Projects party! http://www.atkinsondrive.com/pinworthy-projects-link-party-12/
Ann Marie Heasley
Thanks, Sam!
Hilary
I love it. It's cute!
Ann Marie
thanks, Hilary! I need to go catch up at your blog. How's life treating you?!
Alicia
This is so cute.... But any ideas for being able to do some horizontal pics. I've thought of just doing a type of banner with clips but I'd love something that takes up the wall like this. I love how you can keep switching your pictures out so easily.
Ann Marie
Great question! I might try hanging these sideways with 3M command strips? Also I've been meaning to get some industrial looking school clips (I believe they are called "bulldog" clips) and mount those and hang pictures horizontally. IKEA also has a picture line wire kit with clips, it's sturdier than twine which might bend.
Now you have me wanting to try one of these out! If I ever do, I'll email you and let ya know how it worked. If you try one, let me know! 🙂
Janice
Wondering about the horizontal fix, as well. . . .going to do some photo art projects at the church this summer (having folks emails in things they see that fit the themes) and some, if not all, will be horizontal. . . thanks for a great idea. . .
Ann Marie Heasley
I've since talked to a friend who used 3M adhesive strips to hang them sideways. I haven't tried them because I'm guessing my littles would yank them off the wall, but it should work!
What a great project! Best of luck with it. 🙂
Erin @ DIY On the Cheap
Very cute! I might have to do this in our play room. Love it.
Trina @ Let's Just Build a House
I love them! How fun that you can switch out the photos anytime you like!
Ann Marie
thanks so much! I'm glad you liked em, Trina. I'm looking forward to covering the rest of our walls in em 😉