
If I had to name my blog crushes, Erin from Lansdowne Life would be right up there!
Post after post she comes up with amazingly creative ideas, DIY, and repurposes things you wouldn’t have even thought of. They live in an 81 year old house and are constantly renovating (love!). Her blog is a HUGE source of inspiration and you could fill a pinboard with pretty much everything on Lansdowne Life.
Erin graciously offered to guest post and I jumped at the chance to share her with you guys! Take it away, Erin! 😉

It's February. You're stuck inside the house. The kids are bored. Time to make some valentines! Wait, don't run out to the craft store! You probably have everything you need already in the house!
What you need:
- Paper grocery bag
- Acrylic paint
- Paint brush
- Empty cereal boxes (or similar chipboard)
- Glue
- Scissors
- Paper scraps

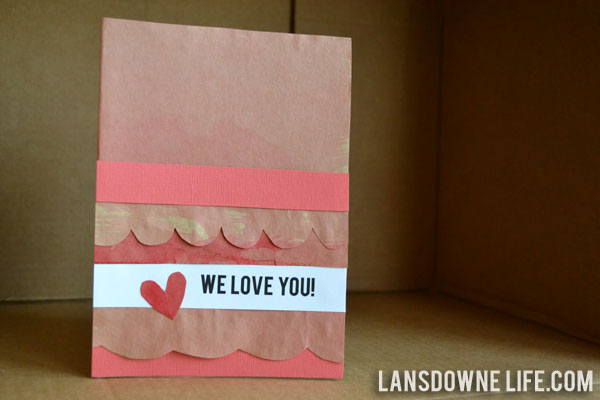
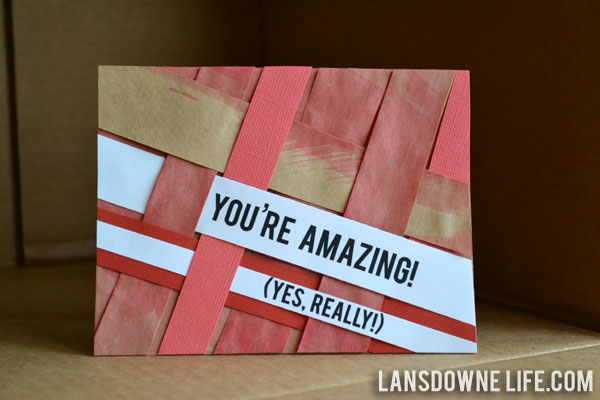
I started with a paper grocery bag, cut it open and flattened it. I watered down some acrylic paint until it was super runny, so that it resembled water color paint. You could also use craft paint, artist acrylics or kid's water color paints. Then I let my two-year-old have at it with a foam brush.
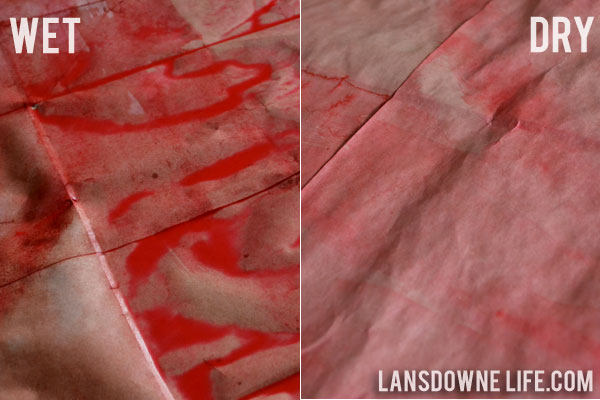
When she was done painting, I let the whole thing dry for several hours. Depending on how much paint is on the paper, this might even take overnight. You can pour off these excess paint if you like, but I like the painterly effects the puddles leave when they dry. Just be sure you have something underneath the paper while it dries because the paint puddles will soak through.

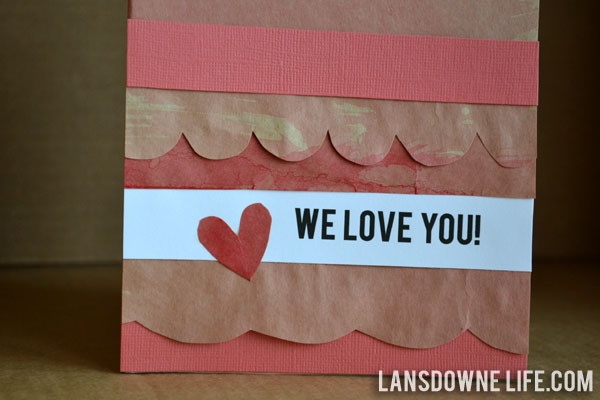
After the paper was dry, it was time to make some valentines. I cut some pieces of chipboard from cereal boxes to use as the bases for my cards, but use whatever you have on hand (or what's in the recycle bin): chipboard, cardboard, or sheets of card stock.
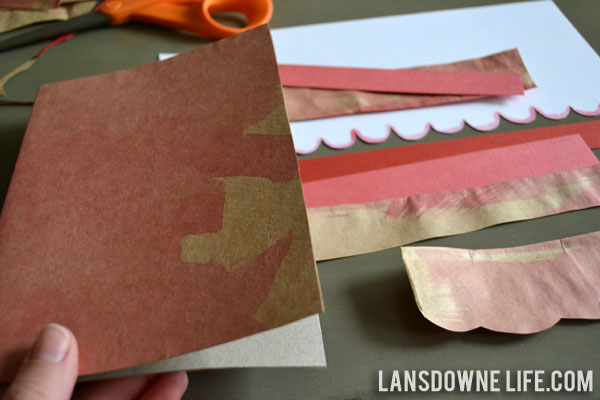
I used a glue stick to glue the grocery bag paper to the printed side of the chipboard. Use your fingers to smooth out the wrinkles. Then decorate however you like!
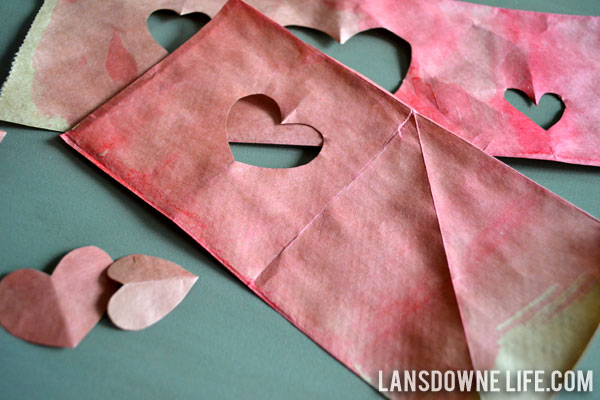
I supplemented my painted paper with some paper scraps in red and pink. This is a great time to drag out all those scraps or other little bits too good to throw away. I also printed out some valentine phrases on white card stock, but that was really the only "new" material I used.
My daughter was a little too young for the card making part of this project, but I'm sure older kids could probably do the whole thing, start to finish, with a little guidance. Happy Valentine's Day!


Skye Moyer
you are so creative 🙂
Marisa
What a cute idea! I wish I could come up with stuff like this on my own, but I am so not creative. I am thankful for tutorials like this! 🙂
Ashley T
Love it! I might have to do this sometime this weekend with my son. He would love it!
fancygrlnancy
cute idea. thanks for sharing.
Sarah
What an adorable idea - love it!! This would be a great project for my classroom!
Megan
Very cute!